Pin me!

Thursday, March 27, 2014

Deliciously Stylish - Kids Edition. Cheesy Vegetable Bake

Looking for a quick and easy recipe for your toddler?  Of course you are!!!  You're a busy parent and sometimes getting a nutritious meal on the table for your toddler, let alone for yourself, can be a challenge.

This cheesy vegetable bake is super simple and takes just a few minutes to prep. The good news is that everyone in the family can enjoy it, so no need to make a separate meal tonight!  


This recipe comes together in 1 bowl and can be adapted to suit your families favorite vegetables and spices.  It takes just a few minutes to prep meaning you may even get to relax a bit during nap time!

I prepare a bunch of vegetables at the beginning of each week and add it into my bambino's meals each day. 

 Some of his current favorites are: 

- caramalized carrots (salt, pepper, turmeric, pinch of sugar, olive oil)
- roasted cauliflower (salt, pepper, cumin, turmeric, olive oil)
- spicy Indian green beans (salt, pepper, red pepper, mustard seeds, turmeric, asafoetida, olive oil) 
- crispy potatoes and onions (salt, pepper, red pepper, olive oil)
- roasted asparagus (salt, pepper, turmeric, olive oil)
- pan fried okra (salt, pepper, red pepper, mustard seeds, turmeric, asafoetida, olive oil)

Ingredients:

- 3/4 cup Reduced Fat Bisquick Mix
- 1 1/2 cups Milk (I used 2% and a splash of whole milk)
- 1 1/2 cups Shredded Cheese - play around with what flavors your family likes
     (Cheddar, Pepper Jack, Monterrey Jack, Mozzarella, Mexican Blends)
- 3 eggs
- 1 - 1 1/2 cups diced, cooked vegetables.  Today I added: carrots, cauliflower and asparagus.  I've also made this with green beans, black olives, mushrooms, peppers and onions, zucchini - use whatever you like and have on hand!
- Season to taste with salt and pepper.  Try Italian Herbs, Cumin, Paprika - the big kids and little kids will love the extra flavor!

Directions:

1. Pre-heat oven to 400 degrees
2. Spray Glass Baking Dish with Pam (square or 9" pie plate)
3. Mix together bisquick, milk and eggs
4. Add in cheese and vegetables and stir together
5. Add in any seasonings you like.  **Since my veggies were already cooked and seasoned, I only added salt and pepper.
6. Bake at 400 degrees for 25-30 minutes

Serving Suggestion:

If you went the Italian route - serve with warm marinara sauce and a salad
If you went the Mexican route - serve with salsa, sour cream, avocado, cilantro-lime rice
or Enjoy on it's own with a little hot sauce

This warms up great the next day.


Happy Cooking and Happy Styling! Because kids eat with their eyes first too!

Saturday, March 1, 2014

Baked Croissant French Toast with Blueberries


Buttery, Flaky, Creamy, Decadent Baked Croissant French Toast with Blueberries

A cross between Bread Pudding, Baked French Toast and a Cream Cheese Danish.  It's pure heaven on a plate.  Seriously, it's that amazing.


Ingredients:

- 3 large croissants cut into large bite size pieces (approx. 5 cups)
- 1 cup fresh or frozen blueberries
- 8 oz softened cream cheese (low fat works too)
- 2/3 cup sugar
- 2 eggs
- 1 cup milk (I used 2%)
- 1 tsp vanilla extract
- 1 tablespoon confectioners sugar (for garnish)

Directions:

1. Preheat oven to 350 degrees

2. Place croissant pieces in a 9" square oven safe dish.  8x10 or 9x11 would work just as well.
Sprinkle 1 cup of blueberries all over the top

3. Beat softened cream cheese, sugar, eggs, milk and vanilla with an electric mixer

4. Pour mixture evenly over the croissant pieces and blueberries and let it sit for 20 minutes

5. Bake at 350 for 35-40 minutes until it is golden brown and the custard is set.  I covered the dish with foil when there was 10 minutes left on the timer just to prevent the top from browning too much

6. Dust with confectioners sugar and serve warm

7. Try not to eat the whole pan!


Happy Cooking and Happy Styling!


Recipe adapted from: Kraft

Baked Oatmeal with Fruits and Nuts


This baked oatmeal is a delicious treat.  Make ahead and heat up for breakfast during the week, if there are leftovers.  Customize with your favorite fruits and nuts.  Hearty, warm, crunchy, sweet and Deliciously Stylish!


Recipe adapted from Inspired By Life: http://www.aaronandyolanda.com/2013/07/baked-oatmeal-casserole.html

Ingredients:

- 2 cups rolled oats (I used Quick Cooking Quaker Oats) 
- 1/3 cup brown sugar
- 1 tsp baking powder
- 1 tsp cinnamon
- 1/2 tsp salt
- 1/2 -1 cup walnut pieces (almonds or pecans would be great too!  Use 1/2 cup if you don't like too many nuts)
- 1 cup berries (I used Strawberry, but next time will do a mix of berries)
- 1/2 cup chocolate chips (optional - milk, semi-sweet or dark)
- 2 cups milk (I used 2%)
- 1 large egg beaten
- 3 tbsp butter, melted
- 1 tsp vanilla extract
- 1 ripe banana, peeled, 1/2 -inch slices (I am going to add 2 next time for extra banana goodness!)

*The chocolate chips are optional, but make for a decadent treat like breakfast. I'd leave these out for an "everyday" meal

Directions:

1. Preheat oven to 375 degrees. Spray a 2 quart oven safe baking dish with cooking spray

2. In a large bowl, mix together oats, sugar, baking powder, cinnamon, salt, half of the nuts, half of the chocolate chips, and half the berries

3. In a separate bowl, mix together milk, egg, butter, and vanilla extract

4. Add the oat mixture to the baking dish. Add the remaining walnuts, chocolate chips, and berries. Add the banana slices in a single layer on top

5. Pour the milk mixture over the whole thing and shake the pan a bit to make sure all the oats get soaked evenly

6. Bake it for 30-35 minutes or until the top is a golden brown and the milk has set

* I covered the dish with foil when there was 5-10 minutes left so that the top didn't brown too much


Serving Suggestion:

- Top with a little bit of brown sugar for extra sweetness
- Drizzle with some maple syrup
- Serve in a bowl with a little milk


Happy Cooking and Happy Styling!


Greek Quinoa Casserole

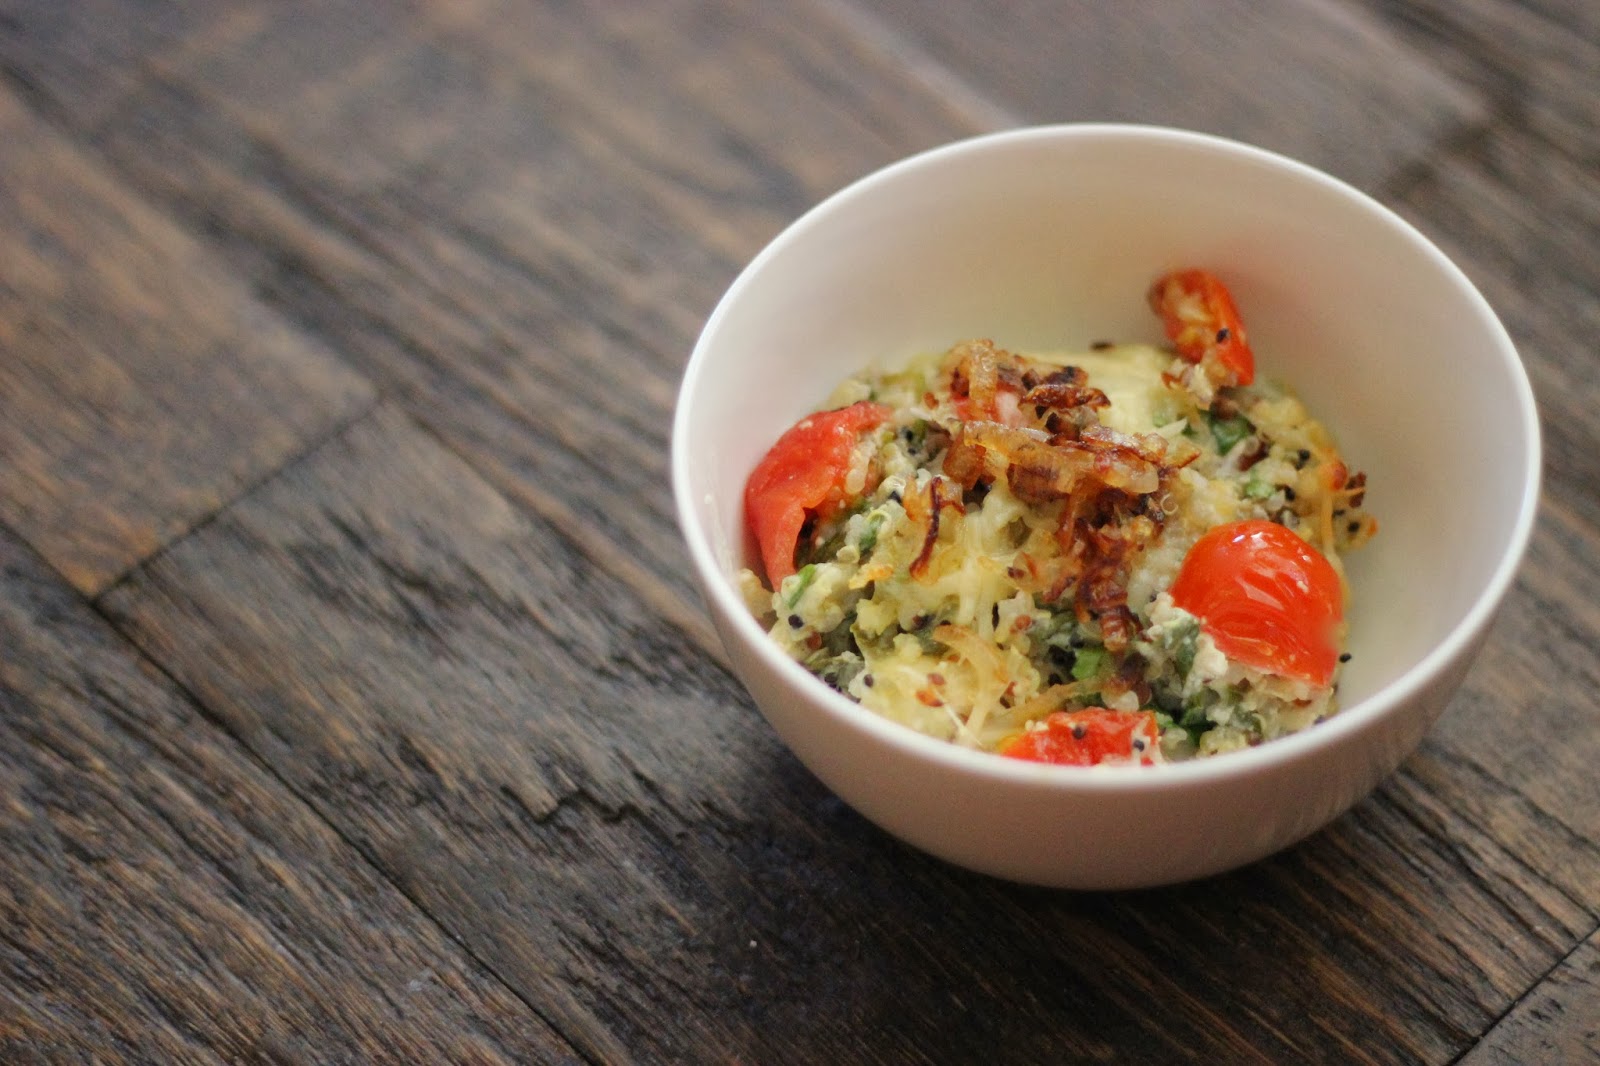
Healthy, Crunchy, Satisfying Quinoa Casserole bursting with Greek Flavors : Spinach, Artichokes, Tomatoes and Feta Cheese.  A simple, hearty lunch or dinner that comes together in no time.


Ingredients:

- 2 1/2 cups Cooked Quinoa
- 1 1/4 cups Feta Cheese (Regular or Fat Free to keep it light)
- 1/4 cup Shredded Parmesan Cheese (optional for a cheesy crust)
- 1/2 cup Shredded Cheese (Mozzarella or any Italian blend)
- 1 cup Marinated Artichoke Hearts (in oil)
- 1 cup Chopped Fresh Spinach
- 1 cup Diced Cherry Tomatoes
- 4-5 Chopped Basil Leaves (can substitute parsley if you don't have basil)
- 1/2 cup Milk (Skim or 2%)
- 1 tsp Crushed Garlic
- 1 tsp Fresh Lemon Juice
- Salt and Pepper to taste

Directions:

1. Prepare quinoa according to package directions.  I add some roasted garlic, a splash of olive oil and salt and pepper for extra flavor

2. Chop spinach, cherry tomatoes, basil and artichoke hearts and set aside

3. In a food processor, combine 1 cup of feta, milk, garlic and lemon juice, blending until smooth

4. When the quinoa is cooked and slightly cooled, add vegetables, shredded cheese and 1 tbsp oil from the artichokes and stir all together. Pour in the feta sauce, combine, and add salt and pepper to taste.

5. Transfer the mixture to an oven safe dish (I used a 9" square, but if you want more surface area for an extra crunchy topping, use a larger dish)

6. Top with remaining 1/4 cup feta and 1/4 cup of parmesan cheese.  Sprinkle a little olive oil over the cheese to ensure a nice, brown crust

7.  Bake at 400 degrees for 15 minutes.  If the top isn't brown, broil for a few minutes

Recipe adapted from Cooking with Cakes


Serving Suggestion:

Serve with soup or salad or enjoy a large portion for a standalone meal

I have topped this casserole with scallions, chopped parsley and caramalized onions (picture above).  Kalamata olives or capers would also add a nice, salty bite


Happy Cooking and Happy Styling!

Sunday, December 8, 2013

Jalapeño Popper Grilled Cheese & Fire Roasted Tomato Soup

Day 2 of being iced in . . . It's been interesting trying to come up with recipes using only what we have.  I've generally been missing an ingredient or two, so it's been a good test in improvising.

Soup and Grilled Cheese is a classic combo, but we turned up the volume on a cold, cold night.

*Please excuse the amateur pictures; we're a bit stir crazy and trapped indoors with a very active 1 year old, so it's i-phone pictures for now!


Jalapeño Popper Grilled Cheese
makes 2 sandwiches

4 slices of sourdough or other crusty bread - all we had was regular 'ol sandwich bread and it still tasted delicious!
4 jalapeño peppers - instructions for roasting below
2 tablespoons of cream cheese - you'll want to leave this out for a bit so it softens up
2-4 slices of sliced pepperjack cheese - use your favorite flavor here.  I liked the extra kick from the pepperjack
2 tablespoons of butter


Step 1: Roast the Jalapeño Peppers.  I put these in the oven on the rack closest to the top and set it to Broil (500 degrees) for 5 minutes.  One side was already blackened at that point, so I turned them over and broiled for another 5-7 minutes. Place the charred peppers into a ziplock bag and seal.  Let it sit and steam up for at least 5 minutes.  At this point, they should be cool enough to handle and the blistered skin should just peel off.  Remove the outer skin and, split the peppers down the middle and remove the stem and seeds. 

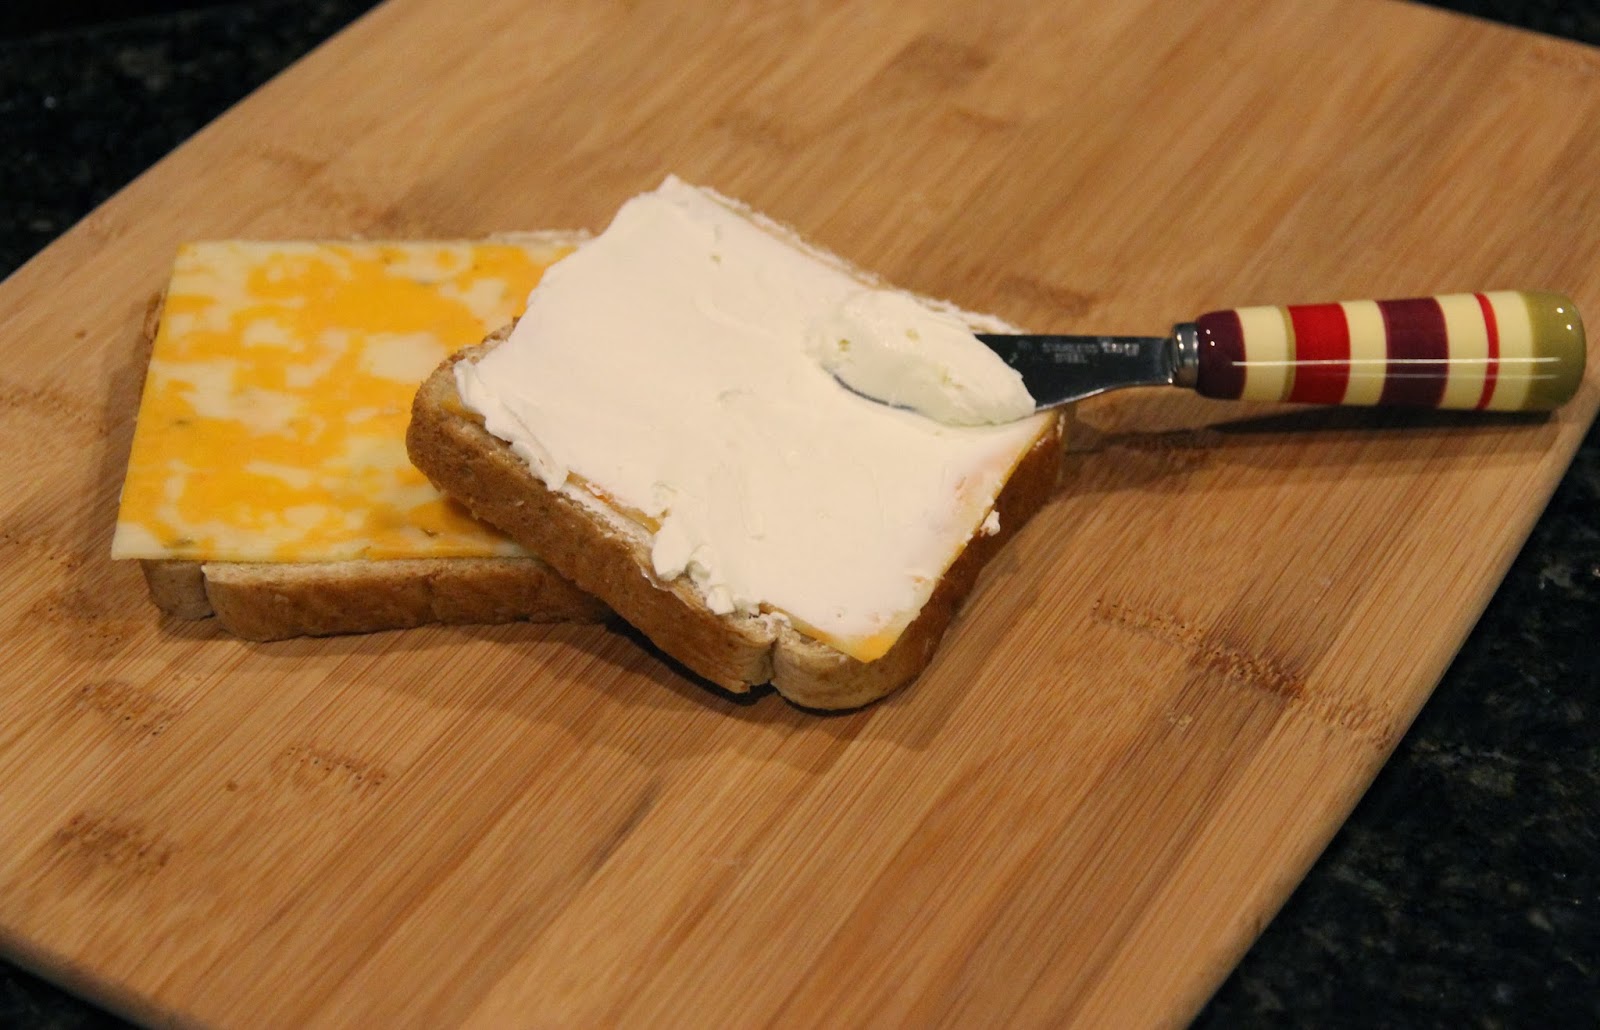
Step 2: Butter the Outside of the bread and spread 1 tablespoon of cream cheese on 2 slices of bread.  Place a slice of cheese on the other side of bread. Place your sliced jalapeño pieces on the cream cheese and close up your sandwich.  Grill for 2-3 minutes on each side on medium heat.  Let it rest for a minute or two. . .if you can wait that long!! Then slice and ENJOY! 

*note: I used this super thin, 40 calorie sliced cheese so I put down the layer of sliced cheese on both pieces of bread and then topped with cream cheese.  I think it helped in not having the cream cheese run off everywhere.  It's meant to be indulgent, so go ahead and add that extra piece of cheese!  


Fire Roasted Tomato Soup
serves 6-8

In a large pot, heat up 2 tablespoons of olive oil
Add 1 diced onion and 3 cloves of garlic, finely minced and sautee them until translucent
Add in 2 (28 oz) cans of Fire Roasted Tomatoes
Stir together and add 3/4 cup of vegetable broth.  I didn't have this on hand and just added water.

Add in:
1 tablespoon of red pepper flakes - adjust this up or down to your taste 
1 tablespoon of sea salt
1/2 tablespoon of black pepper
1/2 tablespoon of ground cumin
1 tablespoon of balsamic vinegar or balsamic glaze
1 teaspoon dried basil
1 teaspoon dried oregano

Let this come to a boil and then either transfer in batches to a blender, or use an immersion blender to puree.

I added 3 handfuls of baby spinach leaves before blending just to add a little body to the soup.

The recipe that I adapted called for 1/2 cup of cream to be added after blending.  I didn't have any cream, so I added a splash of milk and a few spoons of sour cream.  I think the soup would have been fine without it, but in an ice storm, you improvise where you can!

I promise to take better pictures next time I make this and hopefully we will  have some sunlight!

Serve up a piping hot bowl of this soup topped with some basil and enjoy dipping that ooey, gooey grilled cheese into it.


Happy Cooking and Happy Styling!


Friday, December 6, 2013

Mexican Hot Chocolate topped with Grand Marnier Whipped Cream

It's Ice-pocalypse 2013 in Dallas which translates to Food-pocalypse in our house.  The fridge, freezer and pantry are stocked and with nowhere to go, it's all about comfort foods for the next few days.

This afternoon's treat was a hot cup (or two) of Mexican Hot Chocolate topped with a dreamy Grand Marnier Whipped Cream.  It's okay to be a little naughty when you're iced in, right?  The addition of cornstarch makes this Hot Chocolate thick, almost like a drinking chocolate.  I have a feeling if I didn't add it and this was a thinner consistency, it would already be gone!  Take time to savour this drink. . .this recipe makes plenty of servings. 

Most hot chocolate recipes call for heavy cream, but it's something we don't typically have at home.  So, I improvised.  You can't really mess up hot chocolate. . . but you can make it amazing with a few key ingredients.


Ingredients:

3 cups whole milk - i'm sure it would be perfectly fine with 2%
8 oz. evaporated milk 
1/4 cup unsweetened cocoa powder
1/4 cup white sugar
2 tablespoons cornstarch - omit if you prefer a thinner consistency
1 tablespoon pure vanilla extract
1/4 to 1/2 teaspoon ground cinnamon
1/4 teaspoon ground cayenne pepper
1/2 teaspoon sea salt
1/2 teaspoon instant coffee or espresso granules
1/4 cup chocolate chips - semi sweet, milk or bittersweet - totally optional, but I have a chocolate monster at home, so extra sweet is always a welcome touch

Few notes:
The ground cinnamon and cayenne pepper give it a mild little kick.
You won't taste the coffee or espresso; it simply enhances the flavor of the chocolate.  


Directions:

Combine the milks in a saucepan and warm over medium - low heat.  You do not want the milk to boil at this point.

Combine all of the dry ingredients in a bowl and give it a good stir.  Whisk into the warmed milk and bring to a boil.  You really want need to whisk constantly so that it doesn't burn.  Add your chocolate chips at the end and stir until all melted.  

It's an ice storm, so why not a little boozy whipped topping?  The amount I added is negligible. . .it would be delicious plain or with vanilla, almond or even peppermint extract added.  Your choice.

I took the easy route since i've been cooking all day, and grabbed a container of good 'ol Cool Whip.  I added 1/2 a cup of whipped topping and 1 tablespoon of Grand Marnier to a bowl and gave it a good whisk.  This was enough for both of our cups.  Dollop it on or add it to a pastry bag and swirl it on.  I used the low fat kind, so it didn't really hold it's shape but the taste was out of this world.  There are plenty of how to tips for making your own whipped cream online, if you want to go that route.

I dusted a little bit of cocoa powder on the top just for fun...this blog is called Deliciously Stylish after all! 

I love how the cool whipped topping slowly melts into the hot chocolate.  Ice storm, snow storm, rainy day or sunny day, this is my new go-to hot chocolate recipe.  Give it a try, and let me know what you think!


Happy Cooking and Happy Styling!

Friday, October 11, 2013

Pear & Gorgonzola Pizza

I'm really into combining sweet and savory ingredients, even when it comes to pizza.  These combinations are popping up everywhere and I absolutely love a fun, gourmet pizza.  So, ditch the tomato sauce for a night and give this sweet, salty, taste bud tingling delight a chance! 


Step 1: Start with Pizza Dough.  My go to recipe is Ina's (of course).  Perfectly fluffy and pillowy dough, rolls out nice and thin and keeps in the fridge for a few days.  Can't go wrong with that.  If you're short on time, pick up some dough from your fav pizza place.

Full recipe found here: http://www.foodnetwork.com/recipes/ina-garten/white-pizzas-with-arugula-recipe2/index.html

For the dough:
1 1/4 cups warm (100 to 110 degrees) water
2 packages dry yeast
1 tablespoon honey
3 tablespoons olive oil (I add more like 4)
4 cups all-purpose flour, plus extra for kneading
Kosher salt


*This recipe makes 4 thin pizzas.  Make the whole batch and freeze the rest. 

Directions:

Mix the dough: Combine the water, yeast, honey and 3 tablespoons of olive oil in the bowl of an electric mixer fitted with a dough hook. When the yeast is dissolved, add 3 cups of flour, then 2 teaspoons salt, and mix on medium-low speed. While mixing, add up to 1 more cup of flour, or just enough to make a soft dough. Knead the dough for about 10 minutes until smooth, sprinkling it with the flour as necessary to keep it from sticking to the bowl.

Knead by hand: When the dough is ready, turn it out onto a floured board and knead it by hand a dozen times. It should be smooth and elastic.

Let it rise: Place the dough in a well-oiled bowl and turn it to cover it lightly with oil. Cover the bowl with a kitchen towel and allow the dough to rise at room temperature for 30 minutes.


Step 2: While the dough is rising, get all of your other ingredients together: 

- Fig Preserve or Jam - I find this by the speciality cheeses at most grocery stores and always have a few on hand.  It's amazing on this pizza and great for a cheese plate or even on toast. http://www.dalmatiaimports.com/Product.aspx
- Pear - you'll need 1 for this pizza
- Brie Cheese
- Gorgonzola or Blue Cheese - I like Gorgonzola on this since it's less pungent
- Honey
- Basil
- Caramalized Onions or Shallots *
- Fleur de Sel Salt

How I caramelize Onions:

Melt 2 tablespoons of butter in a small pan.  Thinly slice 1/2 of a larger white onion or 1 medium sized onion.  Reduce the heat to low and slowly toss the onions, coating them in the butter.  Add a pinch of kosher salt and 1 teaspoon to 1 tablespoon of sugar.  Stir occasionally.  This should take around 15-20 minutes.  Towards the end, as they are turning golden brown, watch closely because it will burn in a matter of seconds.  Let cool and set aside.


I make this pizza in our convection toaster oven on the pizza plate that it comes with.  If you don't have a convection oven, make sure your regular oven is super clean and pre-heat to 500 degrees.  If you are unsure of how clean it is, it will bake just fine at 450 -  it just won't be as crispy.

Step 3: Assesmbling:

Roll out 1/4 of your dough into a 12-14" circular shape to fit onto your pan.  You want this to be pretty thin.  This flavor combination tastes best on a thin crust.  Your pizza will taste delicious no matter what shape, so if it's a rectangle or square or jagged oval, don't worry about it!

- Spread a thin layer of fig preserve all the way to the edge (I use 1-2 tablespoons)
- Thinly slice your brie cheese.  Place a few slices all over the pizza.  A little bit goes a long way here.  Most brie comes in 8 oz packages and I used about 1/6th of the package for the whole pizza
- Thinly slice your pear and arrange in concentric circles on top of the Brie
- Spread the caramelized onions all over the pears
- Sprinkle gorgonzola cheese all over the top.  Be as generous as you'd like

Step 4: Bake at 450 for 10-12 minutes or 500 for 8-9 minutes

As soon as it come out of the oven, drizzle a thin stream of honey all over (pick something that isn't overly floral in taste).  Sprinkle some chopped or hand torn basil and then finish it off with a little pinch of fluer de del salt.  The briny finishing salt helps balance out the sweetness of this pizza.


Step 5: Slice, Serve and ENJOY!!!!

This pizza pairs really well with a spinach, arugula or dark green salad tossed in a balsamic dressing or other acidic dressing.

You'll love serving this deliciously stylish food for family, friends for any occasion!


Happy Cooking and Happy Styling!